Posted on

The Best Basic Grilled Corn Recipe?

Title: Grilling Perfection: The Ultimate Basic Grilled Corn Recipe

Introduction:

When it comes to summertime grilling, few things evoke the spirit of the season quite like the sweet, smoky flavor of grilled corn on the cob. Whether you’re hosting a backyard barbecue or simply craving a taste of summer, mastering the art of grilling corn is a must. But fear not, because with this ultimate basic grilled corn recipe, you’ll be well on your way to corn perfection every time.

The Best Basic Grilled Corn Recipe

Ingredients:

  • Fresh ears of corn (as many as desired)
  • Olive oil or melted butter
  • Salt and pepper to taste

Instructions:

  1. Preheat your grill to medium-high heat. If you’re using a charcoal grill, make sure the coals are evenly distributed and glowing red.
  2. While the grill is heating up, prepare the corn by removing the husks and silk. If desired, you can leave a few layers of the husk intact to use as handles while eating.
  3. Brush each ear of corn with olive oil or melted butter, ensuring that the entire surface is coated evenly. This will help prevent the corn from drying out and sticking to the grill.
  4. Sprinkle salt and pepper generously over the oiled or buttered corn. You can also get creative with your seasonings by adding garlic powder, smoked paprika, or chili powder for an extra kick of flavor.
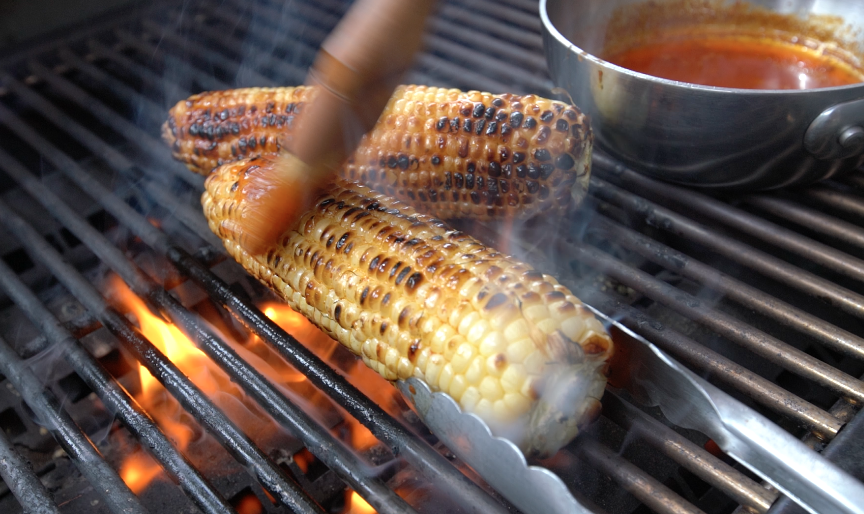
  5. Once the grill is hot, place the corn directly onto the grates. Be sure to arrange them in a single layer, with some space between each ear to allow for even cooking.
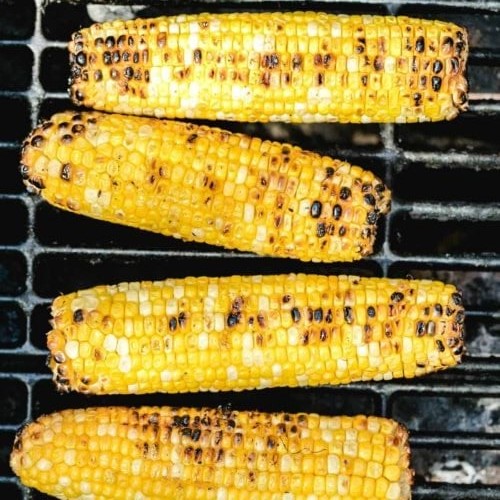
  6. Grill the corn for about 10-15 minutes, turning occasionally with tongs to ensure that all sides are evenly charred. The corn is ready when the kernels are tender and slightly charred in spots.
  7. Remove the corn from the grill and let it cool for a few minutes before serving. If desired, you can garnish with fresh herbs like chopped cilantro or parsley for an added burst of freshness.
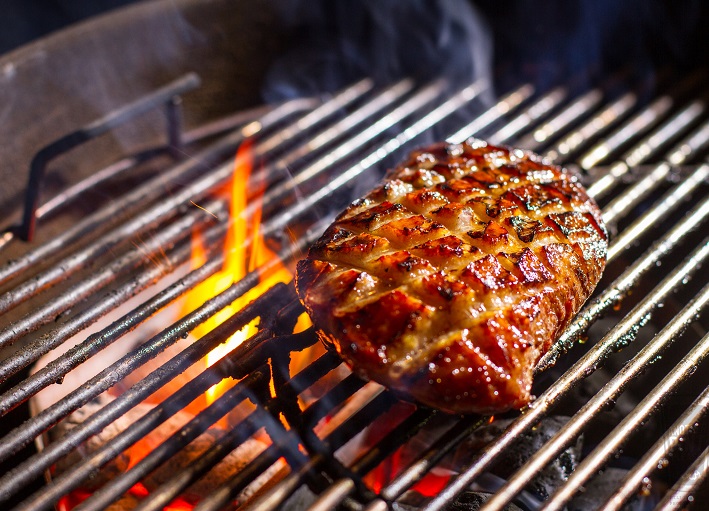
  8. Serve the grilled corn hot off the grill, either on its own or alongside your favorite summer dishes. Whether paired with grilled meats, salads, or enjoyed simply with a pat of butter, this basic grilled corn recipe is sure to be a hit at your next cookout.

Tips for Success:

  • Use fresh, in-season corn for the best flavor and texture.
  • Soak the corn in water for 10-20 minutes before grilling to help prevent it from drying out.
  • Experiment with different seasonings and toppings to customize the flavor to your liking.
  • Don’t overcook the corn, as it can become tough and chewy. Aim for a tender yet slightly crisp texture.
  • If you prefer, you can also grill the corn with the husks on for a more smoky flavor. Simply peel back the husks, remove the silk, and re-cover the corn before grilling.

Conclusion:

With this simple yet delicious basic grilled corn recipe, you’ll be able to enjoy the flavors of summer anytime, anywhere. Whether you’re grilling up a feast for a crowd or simply indulging in a quiet evening at home, there’s nothing quite like the taste of freshly grilled corn on the cob. So fire up the grill, grab some ears of corn, and get ready to savor the season one bite at a time.

Posted on

Best Grilled Corn on the Cob Recipe – How to Cook?

Title: Savor the Flavor: Best Grilled Corn on the Cob Recipe – How to Cook?

Introduction:

There’s something undeniably satisfying about the taste of grilled corn on the cob – the smoky aroma, the caramelized sweetness, the burst of flavor with every bite. Whether you’re hosting a backyard barbecue or simply craving a taste of summer, mastering the art of grilling corn on the cob is a must. Luckily, with a few simple steps and ingredients, you can elevate this classic dish to new heights. Let’s dive into the best-grilled corn on the cob recipe and learn how to cook it to perfection.

Best Grilled Corn on the Cob Recipe

Ingredients:

  • Fresh corn on the cob (as many ears as you need)
  • Butter, softened
  • Salt and pepper to taste
  • Optional: Fresh herbs like parsley, cilantro, or chives for garnish

Instructions:

  1. Preheat the Grill: Start by preheating your grill to medium-high heat. If you’re using a gas grill, aim for around 375°F to 400°F. For charcoal grills, wait until the coals are hot and glowing.
  2. Prepare the Corn: While the grill is heating up, peel back the husks of the corn without removing them entirely. Remove the silk strands and then carefully pull the husks back up over the corn. This creates a natural handle for the corn and helps prevent it from burning.
  3. Soak the Corn (Optional): If you have time, soak the corn in cold water for about 15-30 minutes before grilling. This helps keep the corn moist and prevents it from drying out too quickly on the grill.
  4. Season the Corn: Spread softened butter evenly over each ear of corn, using a brush or your hands. Sprinkle with salt and pepper to taste, ensuring that the seasoning is evenly distributed.
  5. Grill the Corn: Place the prepared corn directly on the grill grates. Close the lid and let the corn cook for about 10-15 minutes, turning occasionally to ensure even cooking. The corn is ready when the kernels are tender and lightly charred in spots.
  6. Serve and Garnish: Once the corn is done, remove it from the grill and transfer it to a serving platter. If desired, sprinkle with additional salt and pepper and garnish with fresh herbs for an extra burst of flavor.
  7. Enjoy: Serve your grilled corn on the cob hot and enjoy the irresistible combination of smoky, sweet, and savory flavors. It pairs perfectly with grilled meats, salads, or as a standalone side dish.

Tips for Success:

  • Choose fresh, in-season corn for the best flavor and texture.
  • Don’t overcook the corn, as it can become tough and chewy. Aim for tender kernels with a slight char for optimal taste.
  • Get creative with seasoning! Try using flavored butters, like garlic or herb-infused butter, for a tasty twist.
  • If you’re short on time, you can grill the corn without soaking it first, but keep a close eye on it to prevent burning.

Conclusion:

Grilled corn on the cob is a quintessential summer dish that never fails to delight. With this simple yet delicious recipe, you can bring the flavors of the grill to your table any time of year. Whether you’re hosting a cookout with friends or simply craving a taste of nostalgia, fire up the grill and get ready to enjoy the ultimate summer side dish.

Posted on

Grilled Duck Breast: Sure-fire Recipe With Temperature Tips

Title: Mastering the Art of Grilled Duck Breast: A Sure-fire Recipe With Temperature Tips

Introduction:

Duck, with its rich flavor and succulent meat, offers a tantalizing alternative to more traditional grilling fare. Grilling duck breast to perfection can be a culinary adventure, and mastering the process requires attention to detail and a few key techniques. In this guide, we’ll explore a sure-fire recipe for grilled duck breast that will elevate your outdoor cooking game, along with essential temperature tips to ensure your dish is cooked to perfection every time.

Grilled Duck Breast

Choosing the Right Duck Breast:

Before diving into the recipe, it’s crucial to start with high-quality duck breasts. Look for fresh, plump breasts with a generous layer of fat. If possible, opt for duck breasts that are free-range and preferably organic, as they tend to offer superior flavor and texture.

Ingredients:

  • 2 duck breasts
  • Salt and freshly ground black pepper
  • Optional: herbs and spices of your choice for seasoning (such as rosemary, thyme, or smoked paprika)

Instructions:

Prepare the Duck Breasts:

  • Begin by patting the duck breasts dry with paper towels. This helps to remove any excess moisture, ensuring a better sear on the grill.
  • Using a sharp knife, score the skin of each duck breast in a crosshatch pattern, being careful not to cut too deeply into the meat. This allows the fat to render more efficiently during cooking and results in crispy, delicious skin.

Season the Duck Breasts:

  • Season the duck breasts generously with salt and freshly ground black pepper, both on the skin side and the flesh side. You can also add additional herbs or spices of your choice at this stage to enhance the flavor of the meat.

Preheat the Grill:

  • Preheat your grill to medium-high heat, around 375-400°F (190-200°C). It’s essential to have a well-heated grill to achieve a beautiful sear on the duck breasts.

Grill the Duck Breasts:

  • Once the grill is hot, place the duck breasts skin-side down on the grates. Allow them to cook for approximately 6-8 minutes, or until the skin is golden brown and crispy.
  • Carefully flip the duck breasts using tongs and continue to grill for an additional 6-8 minutes on the flesh side, or until the internal temperature reaches your desired level of doneness. For medium-rare duck breast, aim for an internal temperature of 130-135°F (54-57°C).

Rest and Serve:

  • Remove the duck breasts from the grill and transfer them to a cutting board. Allow the meat to rest for a few minutes before slicing, which helps redistribute the juices for a more tender and flavorful result.
  • Slice the duck breasts diagonally against the grain into thin slices and serve immediately. Grilled duck breast pairs beautifully with a variety of side dishes, such as roasted vegetables, wild rice, or a fresh salad.

Temperature Tips:

  • Use a meat thermometer to ensure accuracy when grilling duck breast. Insert the thermometer probe into the thickest part of the meat, avoiding contact with bone or fat.
  • Aim for an internal temperature of 130-135°F (54-57°C) for medium-rare duck breast, 140-145°F (60-63°C) for medium, and 150°F (65°C) for medium-well.
  • Remember that duck breast will continue to cook slightly as it rests, so it’s best to remove it from the grill when it’s a few degrees below your desired final temperature.

Conclusion:

Grilling duck breast is a culinary delight that offers a perfect balance of rich flavor and tender texture when done right. By following this sure-fire recipe and temperature tips, you’ll be well on your way to mastering the art of grilled duck breast and impressing your friends and family with your outdoor cooking prowess. So fire up the grill, grab some duck breasts, and get ready to savor a truly unforgettable dining experience!